 Maxim Spencer
Table of contents
Introduction
One of the first hands-on exercises in my DevOps learning journey was creating my own Linux virtual machine environment.
The original exercise asked me to create a Linux Mint virtual machine using VirtualBox. Since I am using a MacBook Air with Apple Silicon, I had to adapt the exercise and choose tools that work better with ARM-based Macs.
That adjustment turned this setup into a much bigger learning experience than I expected. I was not just installing Linux. I was learning how virtualization works, how boot media behaves, how package managers fit into Linux, and how to start troubleshooting when something does not work the first time.
Why This Matters
Virtual machines are an important part of learning DevOps because they give you a safe environment to practice Linux, test commands, install tools, and make mistakes without damaging your main computer.
For me, this mattered because Linux is the foundation for so many DevOps tools and workflows. Cloud servers, containers, CI/CD pipelines, automation scripts, and monitoring systems all depend on being comfortable inside Linux environments.
This exercise helped me move from reading about Linux to actually working inside it.
The Goal
The goal of this exercise was to create a working Linux desktop virtual machine and verify a few basic system details from the terminal.
By the end of the setup, I wanted to be able to:
- Run a Linux VM on my MacBook Air with Apple Silicon
- Install an ARM64 Linux desktop operating system
- Confirm which Linux distribution was installed
- Identify the package manager used by the system
- Check which terminal text editors were available
- Confirm which shell my user account was using
Tools and Technologies Used
Because VirtualBox was not the best fit for my Apple Silicon setup, I used:
- UTM for virtualization
- Ubuntu Desktop ARM64 as the Linux operating system
- Ubuntu ARM64 ISO installation media
- Bash as the default shell
aptandapt-getfor package management- Nano and Vim as terminal text editors
The ISO file I used was:
ubuntu-26.04-desktop-arm64.iso
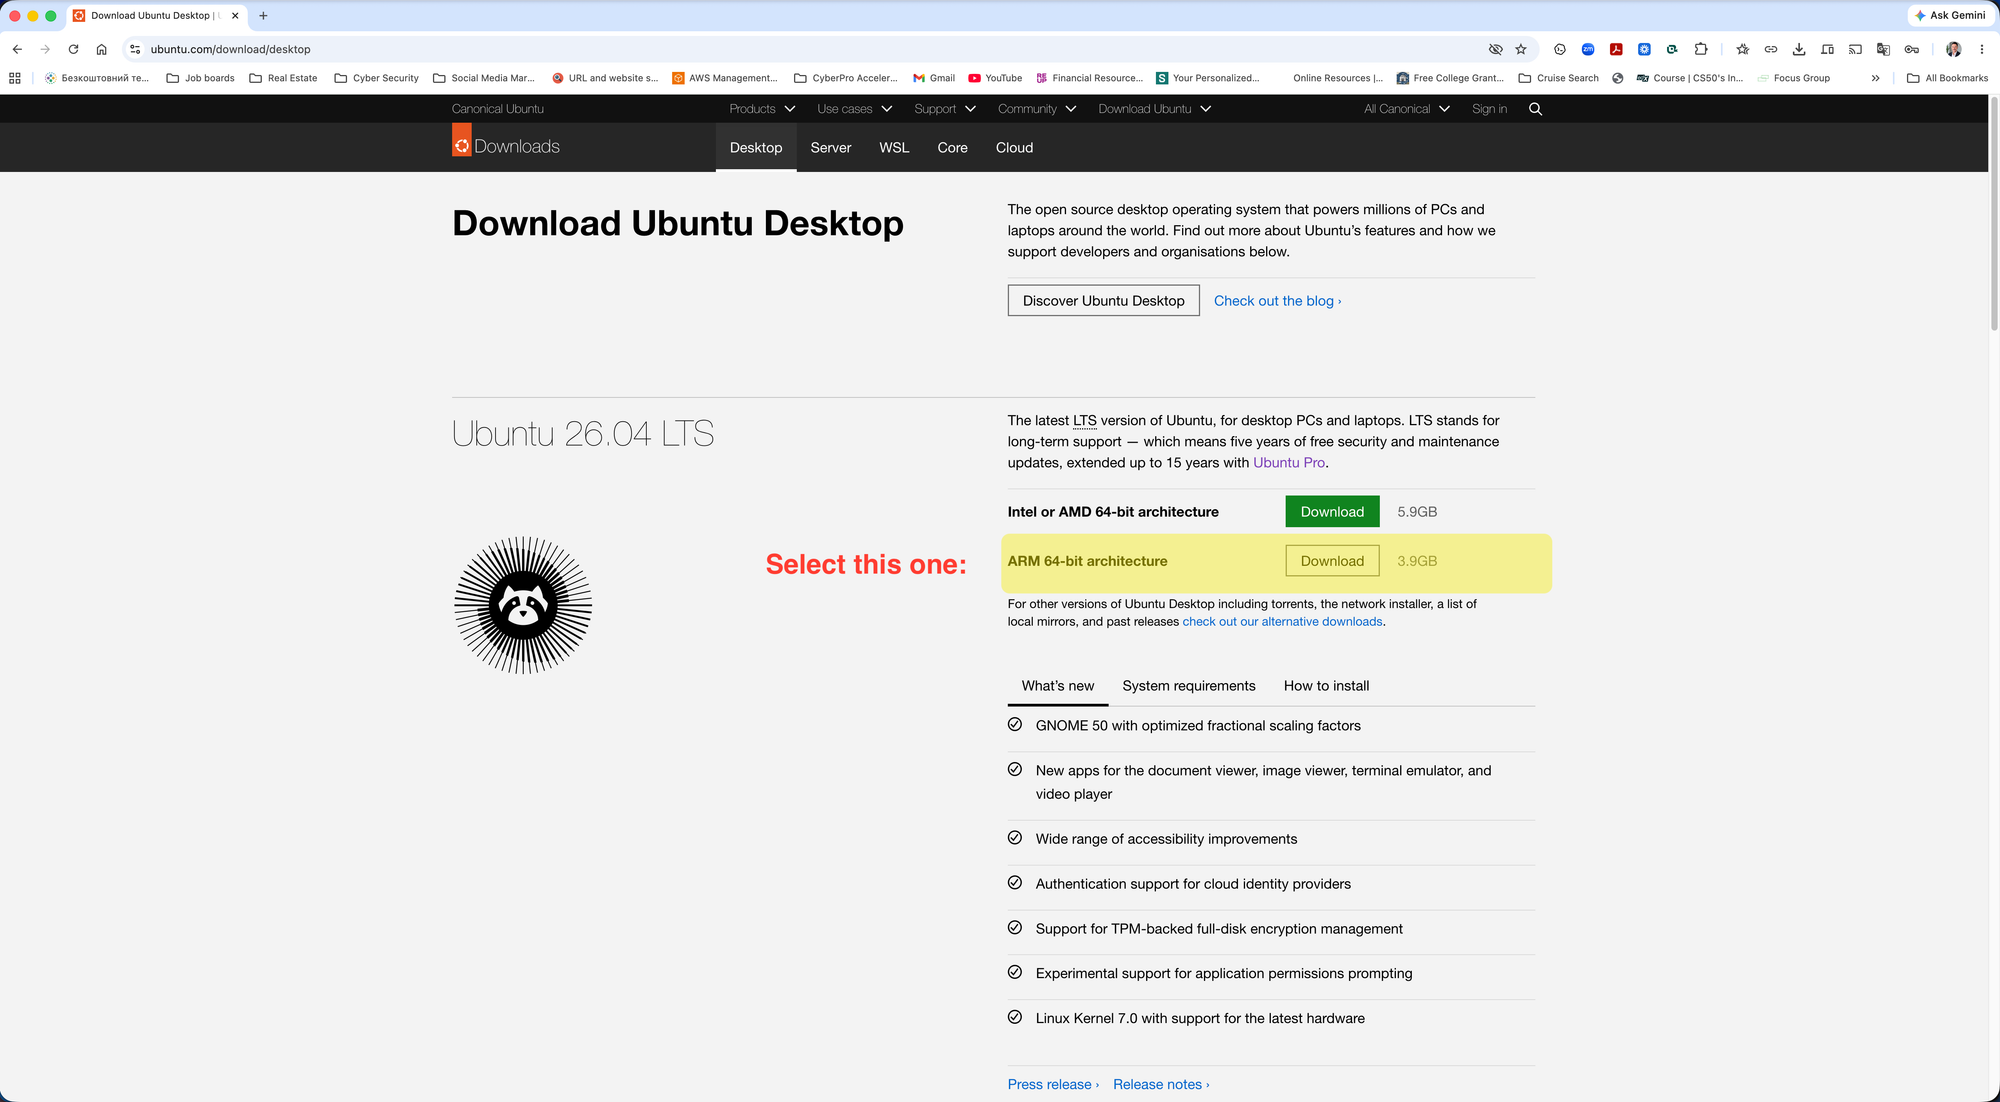
Using UTM introduced me to the difference between ARM64 and x86_64 architecture. That was one of the first times I understood that not every operating system image or virtualization tool works the same way on every computer.
Step-by-Step Process
First, I researched whether VirtualBox would work well on Apple Silicon. I quickly learned that virtualization on Apple Silicon Macs is different from virtualization on older Intel-based Macs, and some VM features can be less smooth depending on the operating system and architecture.
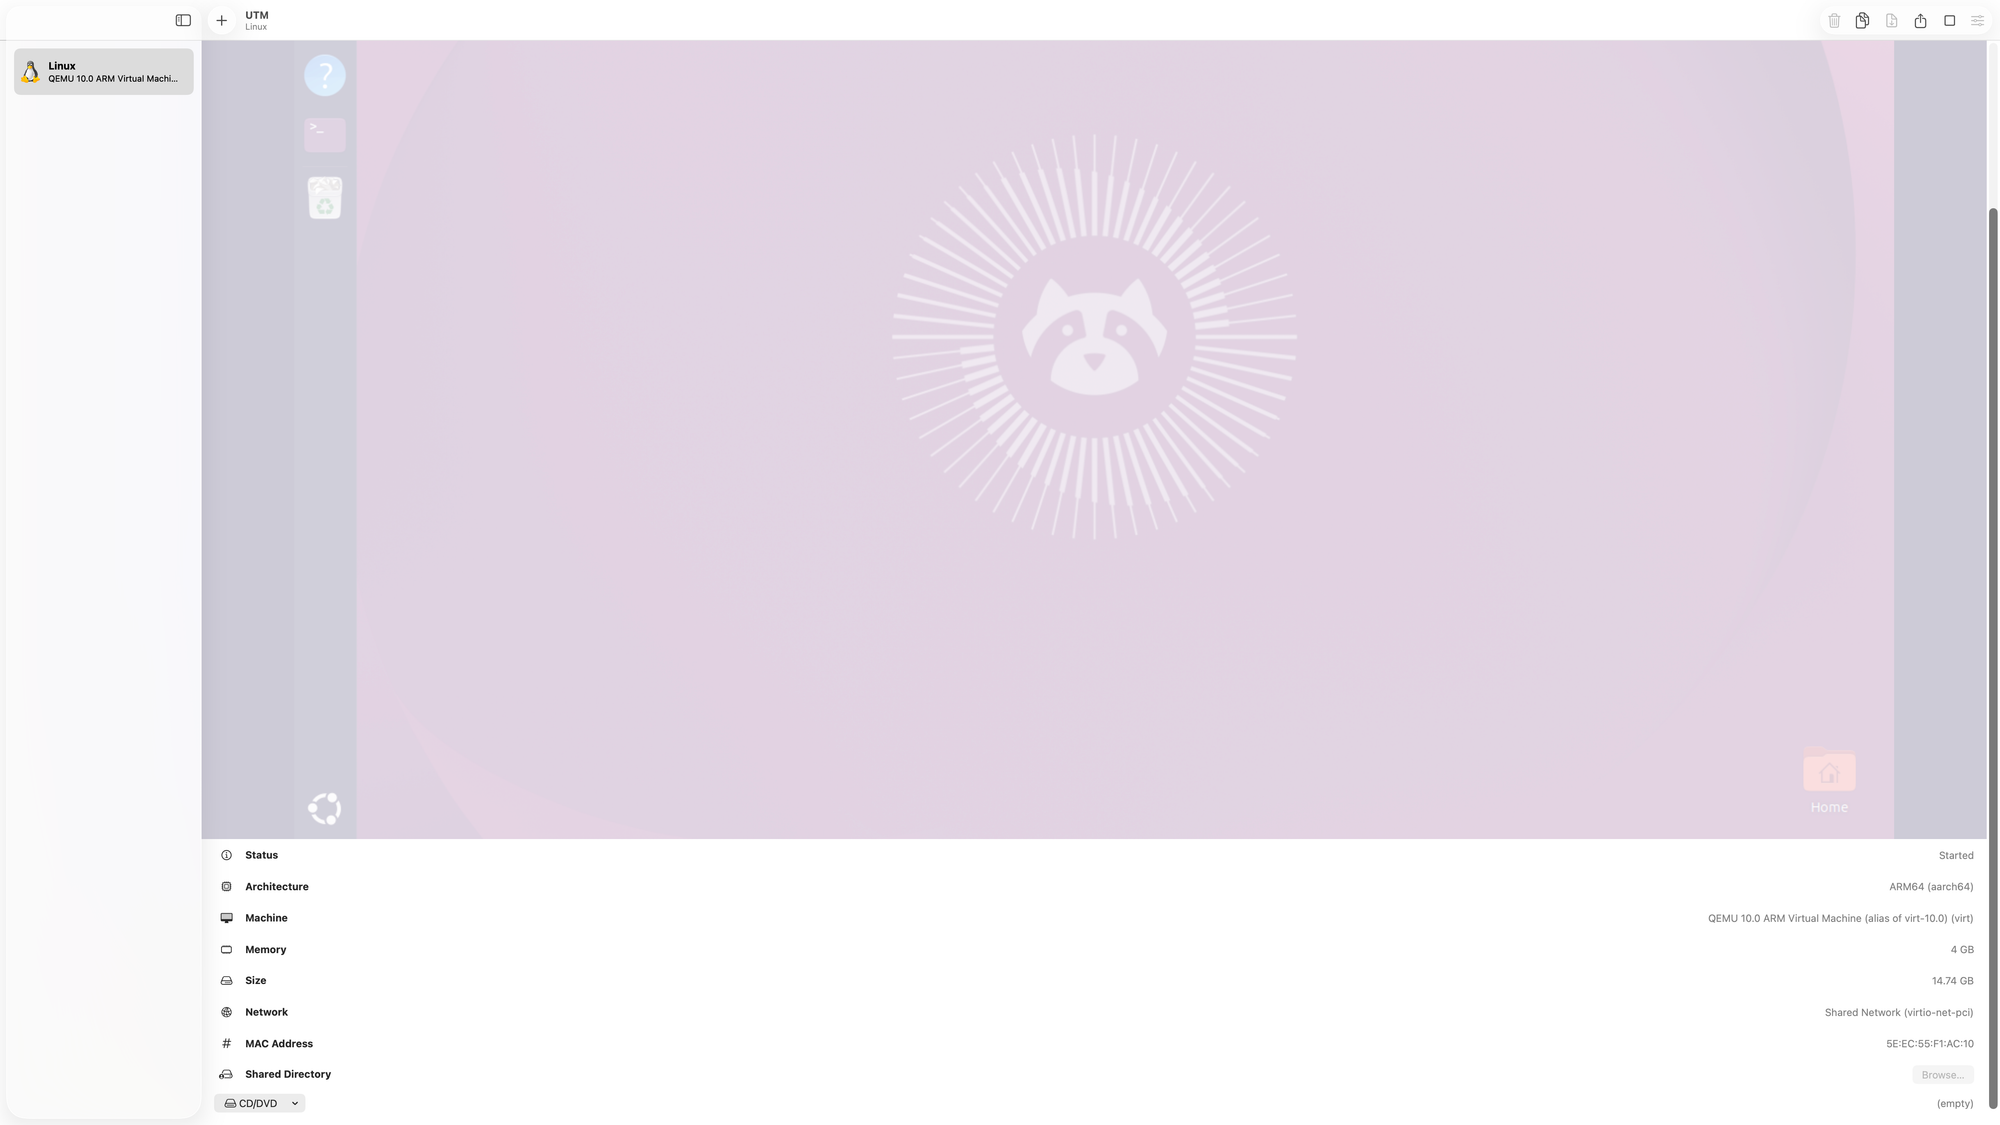
Instead of forcing the original instructions, I decided to use UTM because it is well suited for Linux virtualization on Apple Silicon.
Inside UTM, I created a new virtual machine and configured the main resources:
- CPU allocation
- RAM allocation
- Storage size
- Virtual networking
- Boot media using the Ubuntu ARM64 ISO
After configuring the VM, I started the installation process and installed Ubuntu Desktop inside the virtual machine.
Once Ubuntu was installed, I began checking the system from the terminal.
To verify the Linux distribution, I ran:
cat /etc/os-release
The result confirmed that I was running Ubuntu:
Ubuntu 26.04 LTS
To check the package manager, I ran:
apt
The result showed:
apt 3.2.0
This confirmed that Ubuntu uses apt as its package manager. I also learned that apt and apt-get are used to update packages, install software, remove software, and manage dependencies.
For example:
sudo apt update
sudo apt install vim
Next, I checked which command-line text editors were available.
Nano was already installed by default:
nano
Vim was not installed at first, so I installed it manually:
sudo apt install vim
That was a small step, but it helped me understand how software installation works from the Linux terminal.
Finally, I checked which shell my user account was using:
echo $SHELL
The result was:
/bin/bash
This confirmed that my account was using Bash as the default shell.
Understanding the Concepts
This exercise helped me connect several beginner Linux and virtualization concepts.
A virtual machine is a software-based computer running inside a physical computer. UTM provides the virtual hardware, and Ubuntu runs as the guest operating system inside that environment.
An ISO file acts like installation media. It is similar to inserting a bootable USB drive or DVD into a physical computer. The VM can boot from the ISO to install the operating system.
The package manager is how Linux installs and manages software. On Ubuntu, apt handles package installation, updates, removals, and dependencies.
The shell is the command interpreter. The terminal is the window I type into, but Bash is the program that reads and runs my commands.
That distinction between terminal and shell was one of the concepts that finally started to click for me during this exercise.
Troubleshooting / What Confused Me
The biggest issue I ran into happened after Ubuntu finished installing.
When I restarted the VM, it kept trying to boot back into the installer instead of opening the installed Ubuntu system. At first, I did not understand why. I thought something had gone wrong with the installation.
Eventually, I realized the Ubuntu ISO was still mounted inside the VM's virtual CD/DVD drive. Because the ISO was still attached, UTM kept treating it like bootable installation media.
To fix it, I had to:
- Open the VM settings in UTM
- Find the CD/DVD section
- Eject or clear the mounted ISO image
- Restart the VM
After removing the ISO from the virtual CD/DVD drive, the VM booted into Ubuntu correctly.
That troubleshooting moment taught me a lot about boot order, installation media, and how virtual hardware behaves.
What Finally Clicked For Me
The biggest realization was that setup problems are part of the learning process.
Before this exercise, terms like virtual machine, ISO, boot media, package manager, shell, and architecture felt disconnected. After setting up the VM myself and fixing the boot issue, those ideas started to fit together.
I also understood why adapting instructions matters. The original exercise used Linux Mint and VirtualBox, but my hardware required a different approach. Choosing UTM and Ubuntu ARM64 helped me complete the same learning goal in a way that made sense for my system.
Biggest Takeaways
This exercise gave me hands-on experience with:
- Linux virtualization on Apple Silicon
- ARM64 operating system images
- Ubuntu installation
- VM resource allocation
- Boot media troubleshooting
- Linux package management with
apt - Installing software from the terminal
- Nano and Vim as command-line editors
- Bash as a Linux shell
- Working inside a real Linux environment
More importantly, it helped Linux feel less intimidating.
At first, virtual machines, boot settings, shells, package managers, and terminal commands all felt overwhelming. Now they are starting to feel familiar, and that feels exciting.
Final Thoughts
This was quite interesting first step in building the confidence I need for DevOps work, because so much of DevOps depends on being comfortable inside Linux and knowing how to figure things out when the environment does not behave exactly as expected.